Introduction:
Revolutionizing Your Kitchen with Vinyl Kitchen Backsplash
Vinyl Kitchen Backsplash: The kitchen is often referred to as the heart of the home. It’s where meals are prepared, memories are made, and families gather. So why not make it a space that’s as beautiful as it is functional? One of the easiest and most cost-effective ways to upgrade your kitchen is by installing a vinyl kitchen backsplash.
Gone are the days of complicated and expensive backsplash installations that require professional help. Peel and stick vinyl tiles have changed the game, allowing homeowners to create stunning kitchen backsplashes without the need for grout, mortar, or a tile saw. In this article, we’ll dive into everything you need to know about vinyl kitchen backsplashes, from the benefits to installation tips, and everything in between.
Whether you’re a DIY enthusiast or just looking for a simple way to refresh your kitchen, peel and stick vinyl tiles are the ideal solution. So, let’s explore why these tiles are the perfect choice for your next kitchen upgrade.
1. Why Choose Vinyl Kitchen Backsplash Tiles?
When considering options for a new backsplash, the key to success is finding something that’s stylish, durable, and easy to maintain. Here’s why vinyl kitchen backsplash tiles are a top contender:
1.1. Affordability and Cost-Effectiveness
One of the major advantages of using vinyl tiles for your kitchen backsplash is its affordability. Traditional ceramic or glass tiles can be pricey, especially when you factor in the cost of grout, adhesives, and professional installation. With vinyl kitchen backsplash tiles, you get the same high-quality look but at a fraction of the price. They’re a great option for homeowners looking to renovate without breaking the bank.
1.2. Ease of Installation
Peel and stick vinyl tiles are extremely easy to install, making them a popular choice for DIY projects. Unlike traditional tiles that require precise cutting, measuring, and grout application, vinyl kitchen backsplash tiles simply need to be peeled off and stuck to the wall. No need for heavy tools or messy adhesives. This means that even beginners can achieve a professional-looking result in a short amount of time.
1.3. Waterproof and Durable
The kitchen is a space that is regularly exposed to moisture, spills, and heat. Vinyl kitchen backsplash tiles are specifically designed to withstand these elements. With their waterproof coating, they won’t warp or discolor when exposed to water, making them ideal for areas near sinks and stoves. They are also scratch-resistant, ensuring that your backsplash remains looking fresh and new for years to come.
1.4. Variety of Styles and Designs
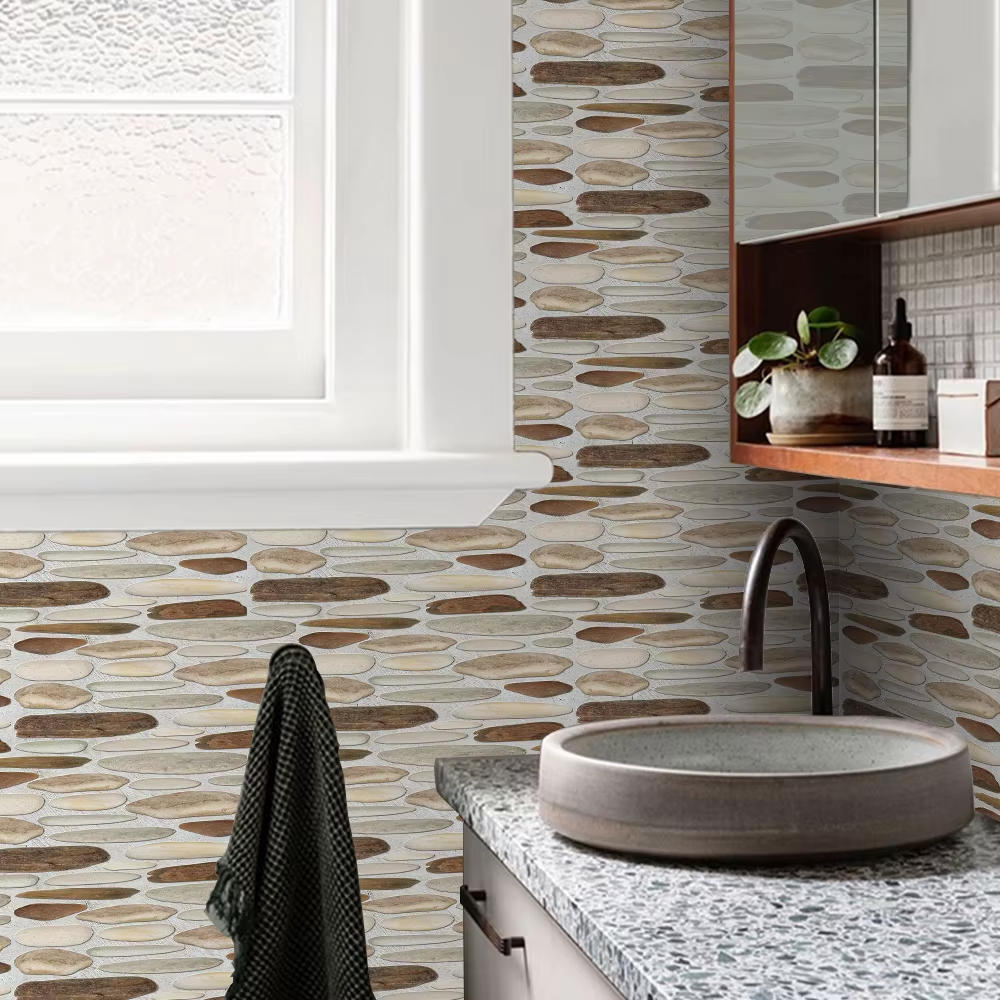
Vinyl kitchen backsplash tiles come in a wide range of styles, colors, and patterns. Whether you prefer a sleek and modern subway tile design, a bold mosaic pattern, or even a rustic wood effect, there’s something for everyone. You can easily find vinyl tiles that complement your existing kitchen décor, helping to create the perfect look for your space.
1.5. Low Maintenance
Once installed, vinyl kitchen backsplash tiles are incredibly easy to clean. Simply wipe them down with a damp cloth or sponge to remove any dirt, grease, or stains. They are resistant to grease buildup, which is a common concern in kitchens. The smooth surface ensures that cleaning is a breeze, making your kitchen upkeep hassle-free.
2. How to Choose the Right Vinyl Kitchen Backsplash Tiles
With so many options available, it’s important to select the right vinyl tiles for your kitchen. Here’s what you should consider when making your choice:
2.1. Color and Style
The first step in choosing your vinyl kitchen backsplash is deciding on the color and style that best suits your kitchen. If you’re looking for something classic, neutral colors like white, gray, or beige are always in style. However, if you want to make a bold statement, consider opting for vibrant colors, metallic finishes, or mosaic patterns. You can also experiment with textures like marble, wood, or stone to create a unique design.
2.2. Size and Shape
Vinyl kitchen backsplash tiles come in a variety of shapes and sizes. You can choose from traditional square tiles, elongated subway tiles, or geometric mosaic patterns. The size of your tiles will depend on the space you are working with. Smaller tiles tend to work well for intricate designs, while larger tiles are ideal for creating a sleek, modern look with fewer seams.
2.3. Finish
The finish of the vinyl tiles is another important factor to consider. High-gloss finishes can mimic the look of glass or ceramic, while matte or textured finishes can provide a more rustic or industrial feel. Choose a finish that complements your overall kitchen style and aesthetic.
2.4. Durability and Quality
When investing in vinyl kitchen backsplash tiles, quality is key. Look for tiles that are made from durable materials such as high-quality PET (Polyethylene Terephthalate) and PU (Polyurethane) glue. These materials ensure that the tiles are sturdy, long-lasting, and resistant to fading, scratching, and heat exposure.
3. Installation Tips for Vinyl Kitchen Backsplash Tiles
Installing vinyl kitchen backsplash tiles is a straightforward process, but there are a few tips to keep in mind to ensure a smooth installation:
3.1. Prepare the Surface
Before you start installing your vinyl backsplash, make sure the wall is clean, dry, and smooth. Any dirt, grease, or debris on the wall will prevent the tiles from adhering properly. Clean the surface with a mild detergent and let it dry completely.
3.2. Measure and Cut
Measure the area where you will be installing the tiles to ensure a perfect fit. If necessary, you can easily cut the tiles to size using a utility knife or scissors. Make sure to leave small gaps around the edges to account for any expansion or contraction.
3.3. Peel and Stick
Once the tiles are cut to size, peel off the adhesive backing and stick the tiles onto the wall. Start from one corner and work your way across, pressing each tile firmly to ensure a secure bond. Be sure to align the tiles evenly to create a seamless look.
3.4. Smooth Out Air Bubbles
As you press each tile into place, make sure to smooth out any air bubbles using a smoothing tool or a cloth. This will ensure that the tiles adhere properly and that the surface looks flawless.
3.5. Finishing Touches
Once the tiles are installed, you may need to apply caulk around the edges to seal the gaps and prevent water from seeping in. You can also add trim along the edges for a polished look.
4. Why Buy Vinyl Kitchen Backsplash Tiles from Clever Mosaics?
If you’re ready to give your kitchen a facelift with vinyl kitchen backsplash tiles, Clever Mosaics is the place to shop. Here’s why:
4.1. Wide Selection of Designs
Clever Mosaics offers a huge variety of peel-and-stick tiles, including vinyl kitchen backsplash options in a range of colors, patterns, and finishes. Whether you prefer classic designs or bold, modern styles, you’ll find the perfect backsplash for your kitchen.
4.2. High-Quality Materials
All tiles sold by Clever Mosaics are made from durable PET and PU materials, ensuring longevity and resistance to moisture, heat, and wear. Their tiles are designed to maintain their appearance and functionality for years, making them a smart investment for your kitchen.
4.3. Easy Online Shopping and Delivery
Clever Mosaics offers convenient online shopping with worldwide shipping, so no matter where you are, you can get your hands on high-quality vinyl tiles for your kitchen. With over 300 designs to choose from, finding your perfect backsplash has never been easier.
4.4. Custom Orders
If you have a specific design in mind, Clever Mosaics also offers custom orders, allowing you to create a truly unique backsplash that reflects your personal style.
5. FAQs: All You Need to Know About Vinyl Kitchen Backsplashes
5.1. Are Vinyl Kitchen Backsplashes Heat Resistant?
Yes, vinyl kitchen backsplash tiles are heat resistant and can withstand moderate heat near stovetops. However, it’s important to follow the manufacturer’s guidelines for installation and maintenance.
5.2. Can I Use Vinyl Tiles in Other Rooms?
While vinyl kitchen backsplash tiles are perfect for kitchens, they can also be used in bathrooms, laundry rooms, and even as accent walls in other areas of your home.
5.3. How Long Do Vinyl Kitchen Backsplashes Last?
With proper care, vinyl kitchen backsplash tiles can last for many years. They are designed to be durable, waterproof, and resistant to wear and tear, making them a long-lasting solution for your kitchen.
5.4. How Do I Clean Vinyl Kitchen Backsplash Tiles?
Vinyl tiles are easy to clean with a damp cloth or mild cleaner. Avoid using harsh chemicals or abrasive scrubbing tools, as they can damage the surface of the tiles.
6. Conclusion: A Quick, Stylish Upgrade for Your Kitchen
If you’re looking for a fast, affordable, and stylish way to upgrade your kitchen, vinyl kitchen backsplash tiles are the perfect solution. With easy installation, low maintenance, and a wide range of designs, these tiles offer both beauty and functionality. Browse through the vast collection at Clever Mosaics and find the ideal backsplash tiles to transform your kitchen today!